
If you contribute to a Provident Fund account, completing your EPFO nomination update is one task you cannot afford to skip. Most salaried employees open a PF account on their first job, contribute every month for years, and never come back to check or complete their nomination. The result? In case something happens to the account holder, the family is left struggling with paperwork, delays, and sometimes legal disputes — all because the EPFO nomination update was never done.
The good news is that EPFO has made this entire process digital. You no longer need to visit a regional PF office or wait for employer approval. This guide walks you through every single step of the EPFO nomination update process, from logging in to the portal to completing the final e-Sign with your Aadhaar Virtual ID.
Why an EPFO Nomination Update Is So Important
A nomination determines who receives your PF balance, EPS pension benefits, and EDLI insurance payout if you pass away before retirement. Without a completed EPFO nomination update, your family doesn’t automatically get the money quickly — they have to go through additional verification, legal heir certificates, and sometimes court processes to establish their claim.
Many people assume their PF money will “obviously” go to their spouse or children. But EPFO doesn’t work on assumption — it works strictly on whatever nomination is on file. If that record is blank, outdated, or names someone who is no longer relevant (like an ex-spouse or estranged relative), it creates real complications. This is exactly why EPFO actively encourages every member to complete their EPFO nomination update as part of basic KYC compliance.
What Exactly Does Your Nomination Cover?
A lot of members don’t realise that one single EPFO nomination update actually covers three separate benefit schemes, not just one lump sum:
EPF (Employees’ Provident Fund) — the accumulated savings amount from monthly contributions.
EPS (Employees’ Pension Scheme) — monthly pension benefits payable to eligible family members. If you’re also planning your own retirement income, check out our Atal Pension Yojana 2026 guide for another government-backed pension option.
Your EPFO nomination update applies across all three schemes simultaneously, which is exactly why getting the details right matters so much — a single nomination error can affect three separate payouts to your family.
Who Can You Nominate?
EPF rules are specific about who qualifies as a nominee:
If you have a family (spouse, children, dependent parents — as defined under EPF rules), your nomination must go to family members only.
If you do not have a family at the time of your EPFO nomination update, you may nominate any person you choose. However, this nomination becomes invalid automatically the moment you acquire a family later — meaning a fresh EPFO nomination update becomes compulsory.
You can split your PF amount between multiple nominees, as long as the total share adds up to exactly 100%.
If a nominee is a minor, you must also provide guardian details, since minors cannot directly claim the funds.
Before You Start: Eligibility Requirements
Before attempting your EPFO nomination update online, make sure of the following:
1 .UAN is activated — Your Universal Account Number should be active on the EPFO Member e-Sewa portal.
2 .Aadhaar-linked and verified — The online e-nomination facility works only for Aadhaar-verified UAN holders. If your KYC isn’t complete, you’ll need to verify Aadhaar through the portal first.
3 .Active mobile number — Your Aadhaar-linked mobile number needs to be working, since OTP verification is central to both login and e-Sign.
4 .Photograph of nominee (optional but recommended) — Some sections allow uploading a nominee photo, which can help avoid identity confusion at claim time.
If any of these aren’t in place, complete them first — attempting the EPFO nomination update without active Aadhaar linkage will simply not work, and the portal will block you at the e-Sign stage.
Step-by-Step: How to Complete Your EPFO Nomination Update Online
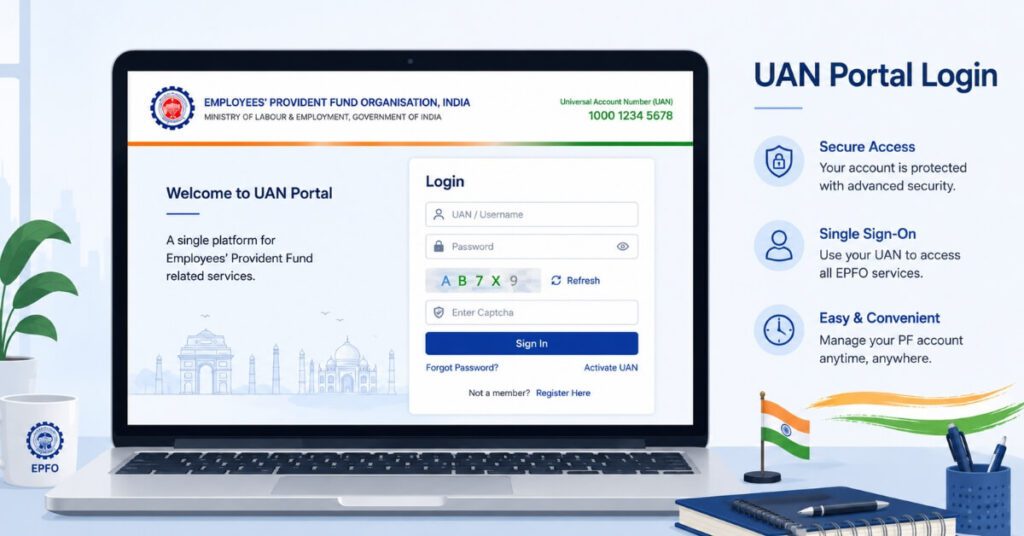
Step 1: Log in to the EPFO Member Portal
“Go to the official EPFO Member Portal. Enter your UAN, password, and the captcha code shown, then click Sign In.”
Step 2: Navigate to the Manage Tab
Once logged in, click on the “Manage” menu at the top of the dashboard. From the dropdown, select “E-Nomination.” This is where your entire EPFO nomination update process begins.
Step 3: Provide Family Declaration
The portal will first ask you to declare whether you have a family as defined under EPF rules. This declaration is a mandatory part of every EPFO nomination update, and your answer here determines who you’re allowed to nominate in the next step.
Step 4: Add Family/Nominee Details
Click “Add Family Details” and fill in information for each person you want to nominate:
Full name
Date of birth
Gender
Relationship to you
Aadhaar number
Permanent and present address
Guardian details, if the nominee is a minor
Bank account details of the nominee are optional at this stage but can be added for convenience.

Step 5: Allocate Nomination Share
After adding all nominees, you’ll be asked to assign a percentage share to each one for both EPF and EPS benefits. This is a critical step in your EPFO nomination update — the combined share must total exactly 100%, or the system will reject your submission.
Step 6: Save Family Details
Click “Save Family Details” once you’re confident the information is accurate. Double-check spellings and Aadhaar numbers here, since mismatches can cause failures later in the e-Sign process.
Step 7: Proceed to e-Sign
Click on “e-Sign” to move to the final authentication stage. EPFO requires every EPFO nomination update to be digitally signed for it to be legally valid.
Step 8: Generate or Enter Your Virtual ID
Since EPFO no longer accepts raw Aadhaar numbers for the e-Sign step due to privacy regulations, you’ll need a Virtual ID (VID) — a temporary 16-digit number generated against your Aadhaar. (Full instructions below.)
Step 9: Complete OTP Verification
After entering your VID, an OTP will be sent to your Aadhaar-linked mobile number. Enter this OTP within the time limit to complete the e-Sign.
Step 10: Download Your Acknowledgement
Once submitted successfully, your EPFO nomination update is recorded instantly in EPFO’s database. Download and save the acknowledgement receipt as proof of submission.
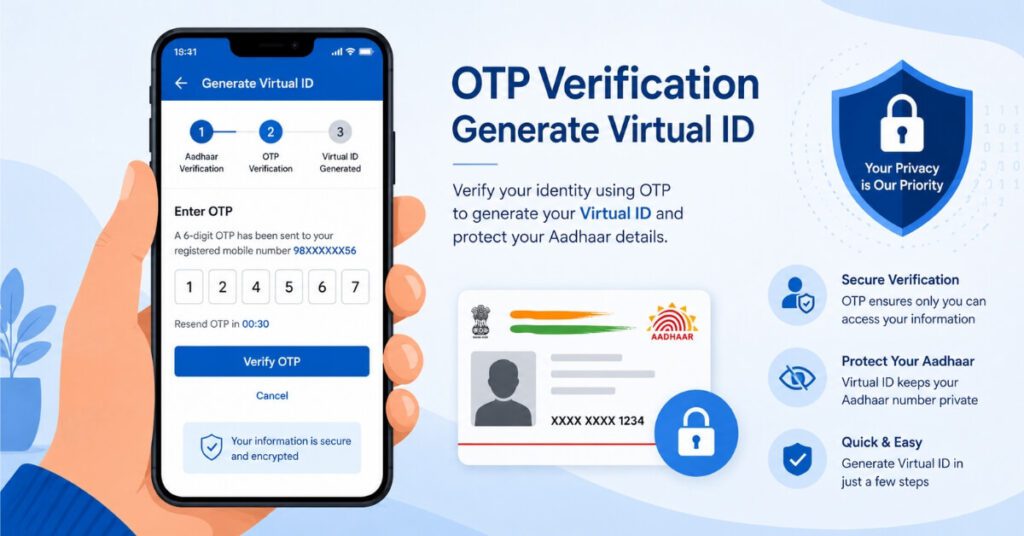
How to Generate a Virtual ID (VID) for e-Sign
A Virtual ID is UIDAI’s privacy tool that lets you authenticate without exposing your actual Aadhaar number. Here’s how to generate one:
1 .Visit the official UIDAI website at uidai.gov.in.
2 .Click on “Virtual ID (VID) Generator” under the Aadhaar Services section.
3 .Enter your 12-digit Aadhaar number and the captcha code.
4 .Select “Generate VID” and click “Send OTP.”
5 .Enter the OTP received on your Aadhaar-linked mobile number.
6 .Your 16-digit Virtual ID will be displayed — note it down or screenshot it.
Alternatively, you can retrieve your VID anytime by sending an SMS with the text GVID to 1947 from your Aadhaar-registered mobile number. This VID is what you’ll use to complete the e-Sign portion of your EPFO nomination update — never share it publicly since it functions like a temporary Aadhaar substitute.
Offline Option: Updating Nomination via Form 2
If you’re unable to complete the EPFO nomination update online — due to Aadhaar linkage issues or portal errors — you can still do it offline:
1 .Download Form No. 2 from the EPFO website or collect it from your employer’s HR department.
2 .Fill in your personal details, family declaration, and nominee information by hand.
3 .Submit the completed form to your employer, who will forward it to the regional EPFO office for record updating.
The offline route takes longer and depends on your employer’s processing speed, which is why most subscribers now prefer the online EPFO nomination update method for speed and convenience.
What Happens After You Submit Your Nomination?
Once your EPFO nomination update is successfully e-Signed, the details are reflected almost instantly in EPFO’s internal records, visible to your employer’s HR/payroll team as well. If a claim is ever filed against your account, EPFO refers directly to this latest nomination record — there’s no separate approval step needed from your employer at the time of claim, since the nomination was already authenticated during submission.
It’s worth noting that submitting a new EPFO nomination update completely replaces the previous one — EPFO does not “merge” old and new nominee lists. So if you previously nominated your parents and now want to add your spouse and children, you must re-enter all nominee details together in the new submission, not just the new additions.
Common Mistakes That Delay or Reject Your EPFO Nomination Update
Leaving the nomination blank entirely, assuming legal heirs will automatically receive the funds. This is incorrect — without nomination, the claim process becomes significantly longer.
Mismatched Aadhaar details — even a small spelling difference between the name on Aadhaar and the name entered in the nomination form can cause the e-Sign step to fail.
Incorrect share percentage — if the total allocated share across nominees doesn’t add up to exactly 100%, the system rejects the submission.
Forgetting to update after a life event — marriage, childbirth, divorce, or death of a previously nominated person should always trigger a fresh EPFO nomination update.
Not generating a fresh Virtual ID — VIDs expire after a period, so always generate a new one if your previous attempt failed or timed out.
Assuming old nominees carry over — as explained above, every new submission fully replaces the old one, so partial updates aren’t possible.

How Often Should You Review Your EPFO Nomination Update?
There’s no fixed schedule mandated by EPFO, but as a practical rule, you should revisit your EPFO nomination update every time there’s a significant change in your family situation. A new nomination submission automatically overrides the previous one in EPFO’s system, so there’s no need to “cancel” an old nomination separately — simply complete the EPFO nomination update process again with the new details.
A good habit is to check your nomination status once a year, even if nothing has changed — this confirms your details are still accurate and the e-Sign was correctly recorded, rather than discovering a gap only when a claim becomes necessary.
Frequently Asked Questions (FAQs)
Q1. Is EPFO nomination update mandatory?
Yes, it’s part of basic KYC compliance and strongly recommended for every PF member.
Q2. Can I complete EPFO nomination update without Aadhaar verification?
No, the online e-nomination facility is only available for Aadhaar-verified UAN holders.
Q3. How many times can I change my nomination?
There’s no limit — you can submit a fresh EPFO nomination update anytime, and the latest submission overrides the previous one.
Q4. What happens if I never complete e-nomination?
Your family may face delays, extra documentation, and possible legal hassle while claiming the PF amount.
Q5. Is Virtual ID different from my Aadhaar number?
Yes, VID is a temporary 16-digit number used instead of your Aadhaar number for added privacy during e-Sign.
Conclusion
Completing your EPFO nomination update takes less than fifteen minutes online, yet it’s one of the most overlooked aspects of financial planning. With Aadhaar-based e-Sign and Virtual ID authentication, EPFO has removed the need for office visits or employer dependency entirely. Don’t leave this task pending — log in to the EPFO Member Portal today, review your existing nomination, and complete your EPFO nomination update so your family’s financial security is never left to chance.
Disclaimer
This article is for informational purposes only and does not constitute financial or legal advice. Procedures and portal interfaces may change over time. Please refer to the official EPFO website (epfindia.gov.in) for the latest rules, or consult a qualified financial advisor for guidance specific to your situation.